Building reports
It is fascinating to see what works of art can be created by modellers through the use of different materials and attention to detail. Each of these little masterpieces deserves to be presented to the public. This website specifically presents the Vacu kits from HSV-Modelle. If you have already built a Vacu kit from HSV-Modelle and would like to contribute to enriching the diversity of this website, I would be delighted to hear from you. Perhaps your presentation will be just the impetus for other modellers to try out a slightly different kit - a so-called Vacu model.
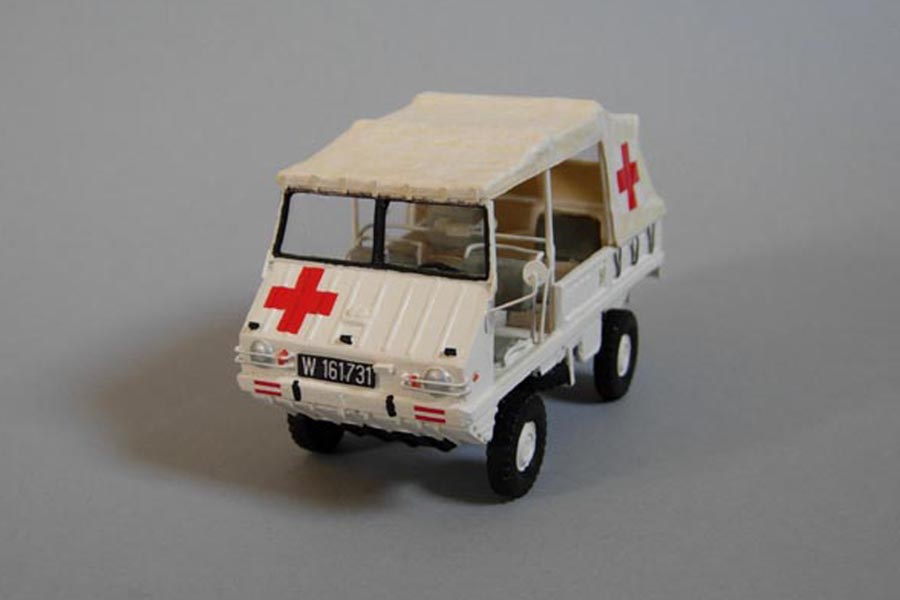
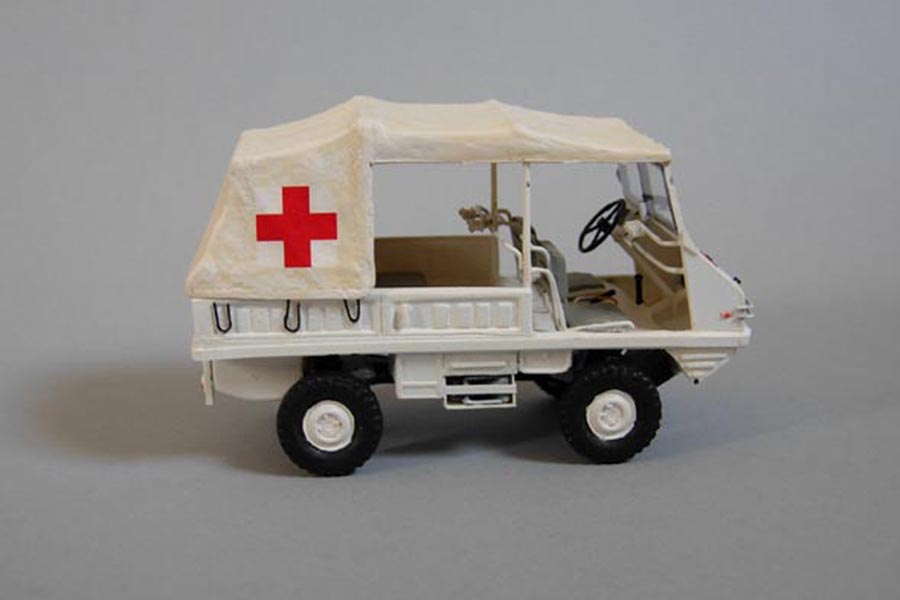
Mountain rescue Reichenau - Emergency vehicles
(Mathias Pehofer)
The 100th anniversary of the Reichenau an der Rax mountain rescue centre was the occasion to build models of the emergency vehicles of the time, namely the Pinzgauer 710K and the Puch G.
The Reichenau an der Rax mountain rescue centre in Lower Austria was founded in 1896 and is one of the most traditional mountain rescue centres in Austria. In 1996, on the occasion of its 100th anniversary, Mathias Pehofer built a 1:35 scale model of the two emergency vehicles of the time. The Pinzgauer 710K was made from the HSV-103 kit, while the Puch G with long wheelbase and fixed body was made from the HSV-126 kit. Both kits were first assembled "out of the box" and then fitted with various self-designed add-on parts.
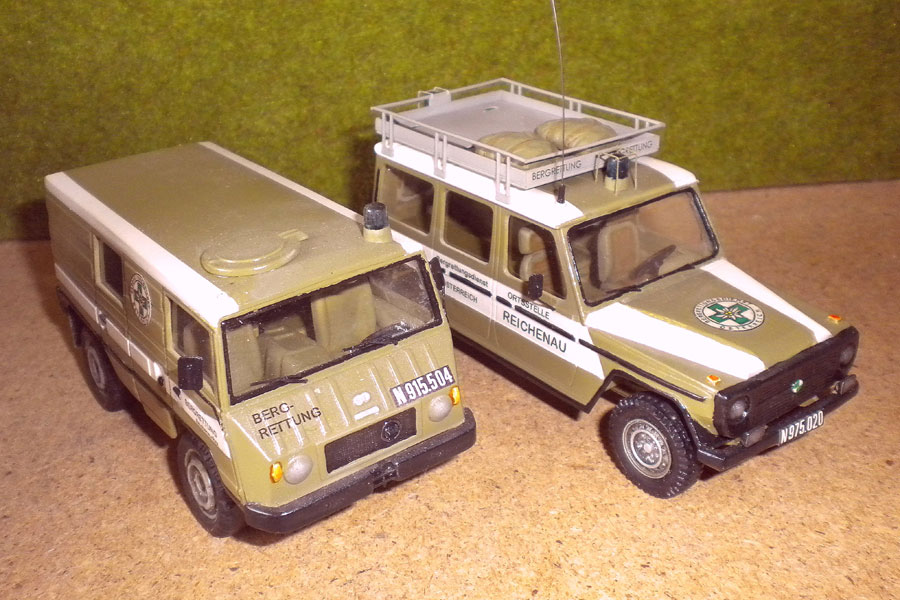
Pinzgauer 710K & Puch G
Mountain rescue Reichenau / Rax 1996
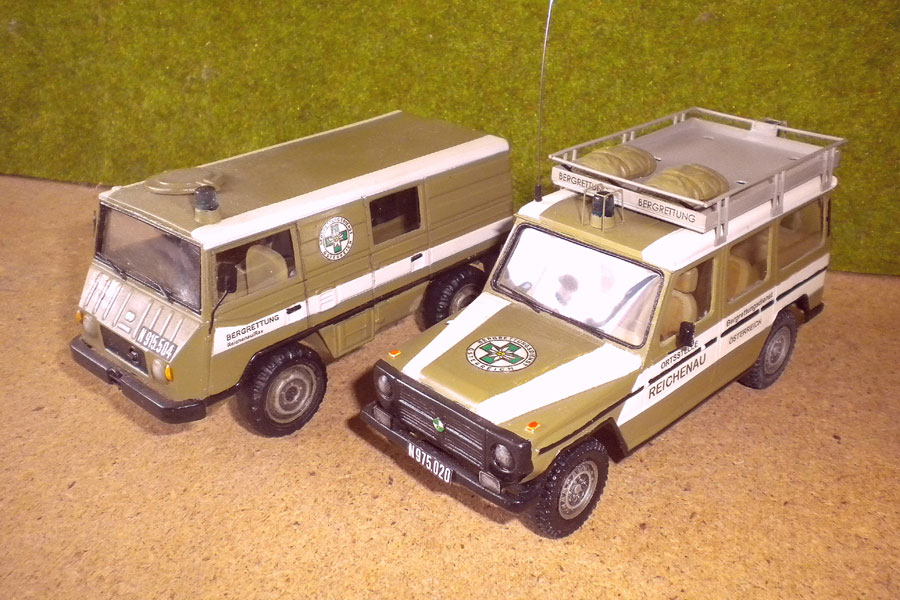
Pinzgauer 710K & Puch G
Mountain rescue Reichenau / Rax 1996
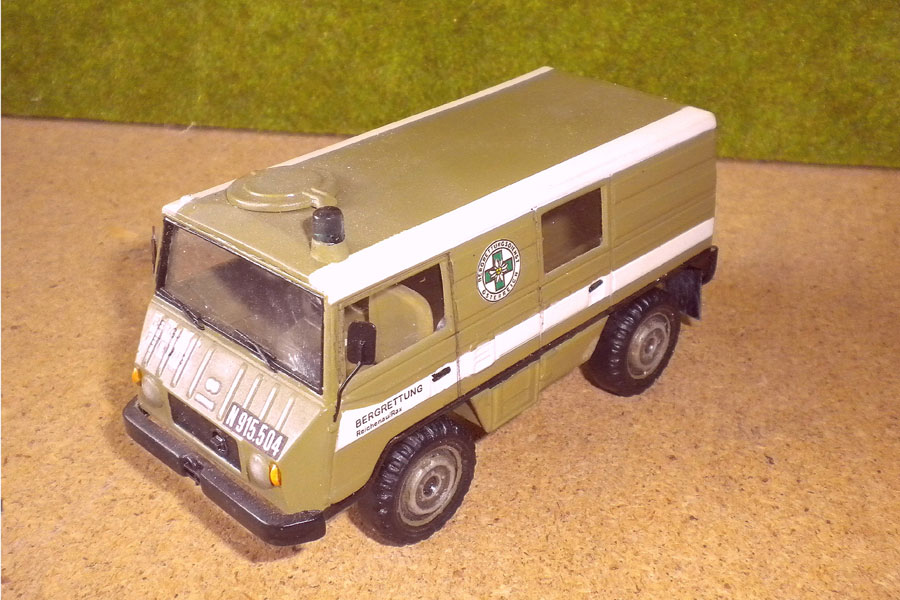
Pinzgauer 710K
Mountain rescue Reichenau / Rax 1996

Pinzgauer 710K
Mountain rescue Reichenau / Rax 1996
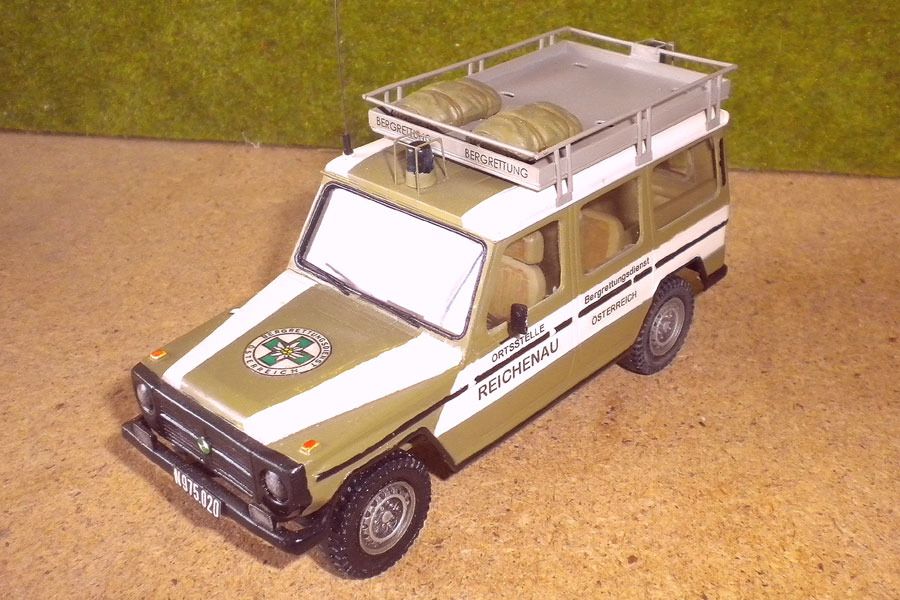
Puch G
Mountain rescue Reichenau / Rax 1996
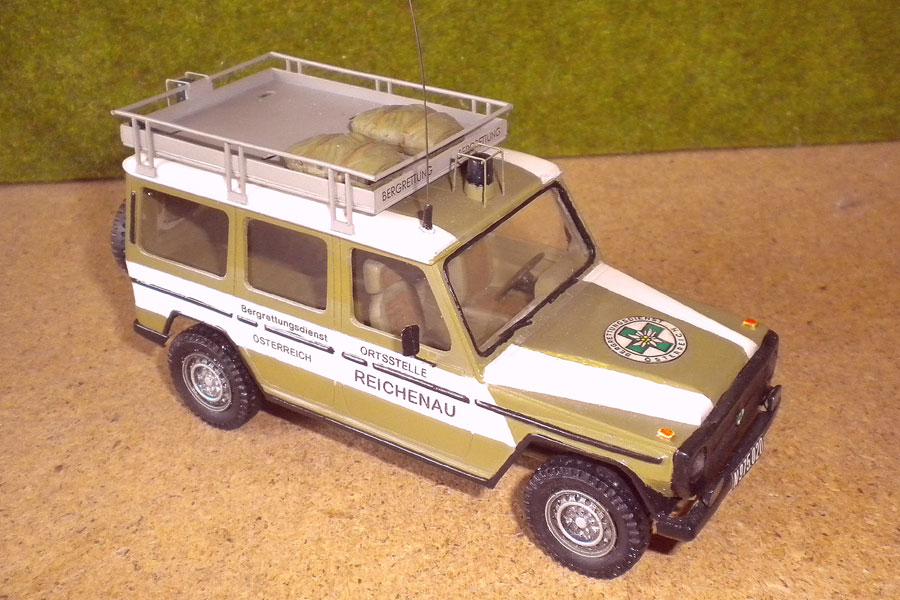
Puch G
Mountain rescue Reichenau / Rax 1996
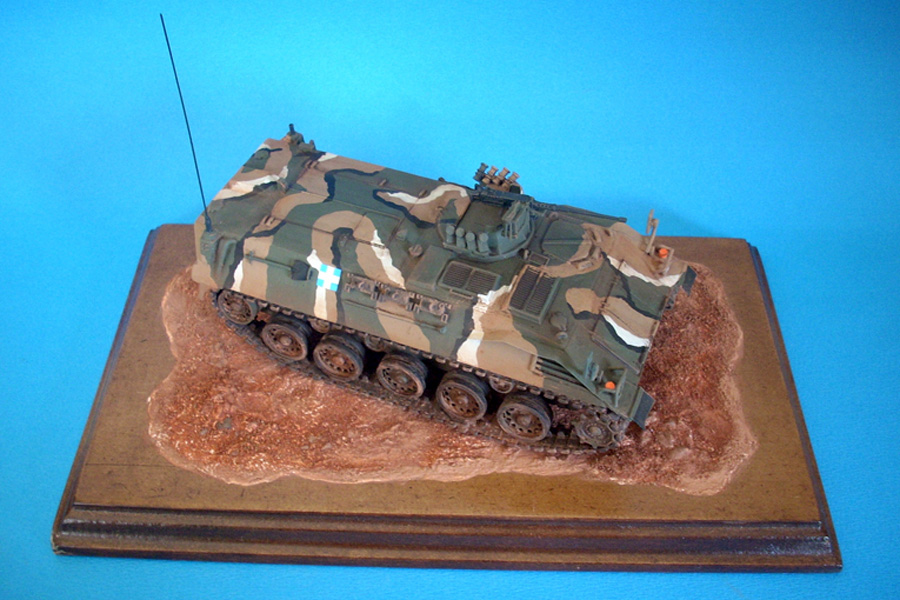
Steyr 680 and Saurer SPz (Steyr Helas)
(Konstantinos Bouris)
Kostas from Greece created models of the Greek air force and army from the HSV kits 114 and 201. These vehicles, the Steyr 680 and the Saurer armoured personnel carrier (under the designation Leonidas II APC), were produced under licence by the company ELVO or ELBO (later Steyr Hellas) in Greece.
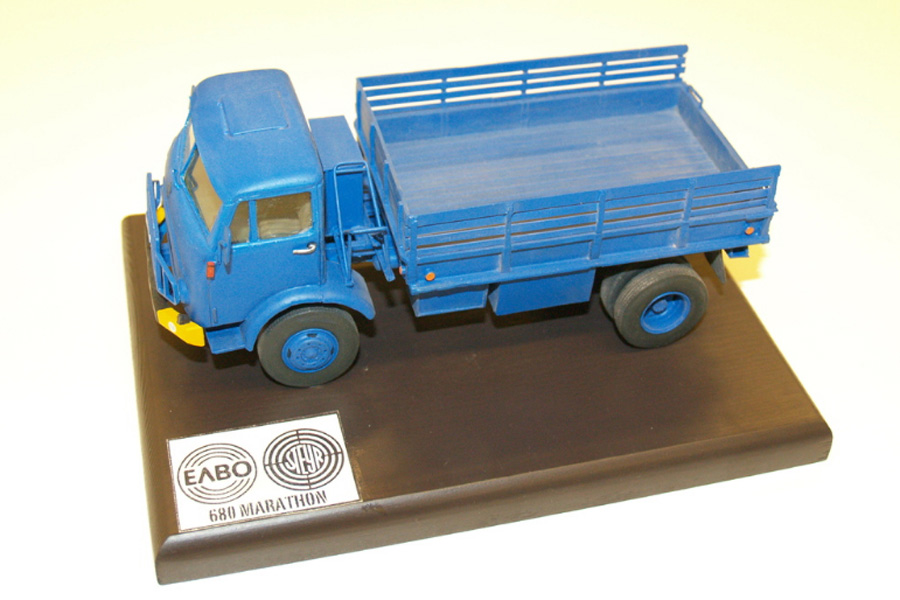
Steyr 680
Greek Air Force
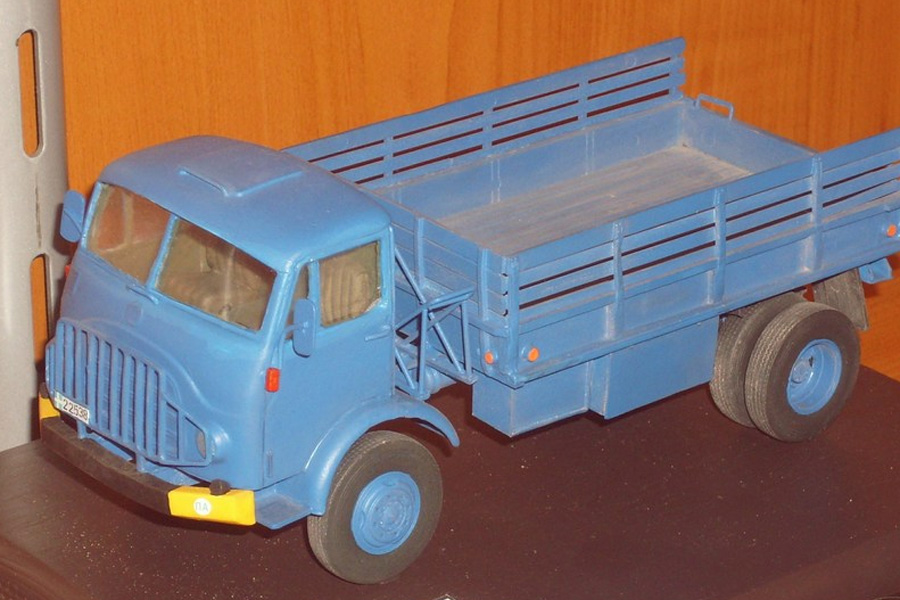
Steyr 680
Greek Air Force
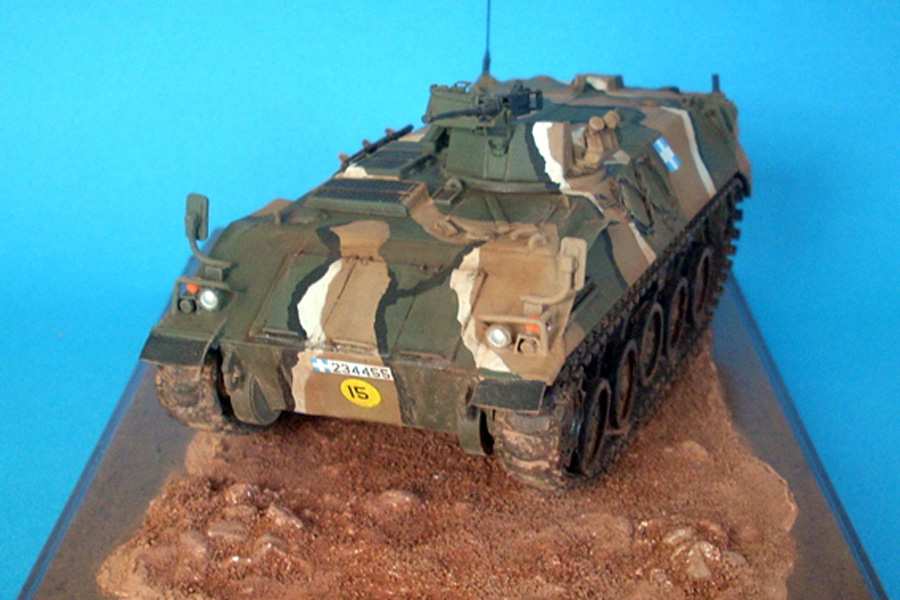
Saurer SPz
Greek army
Steyr SPz
Greek army
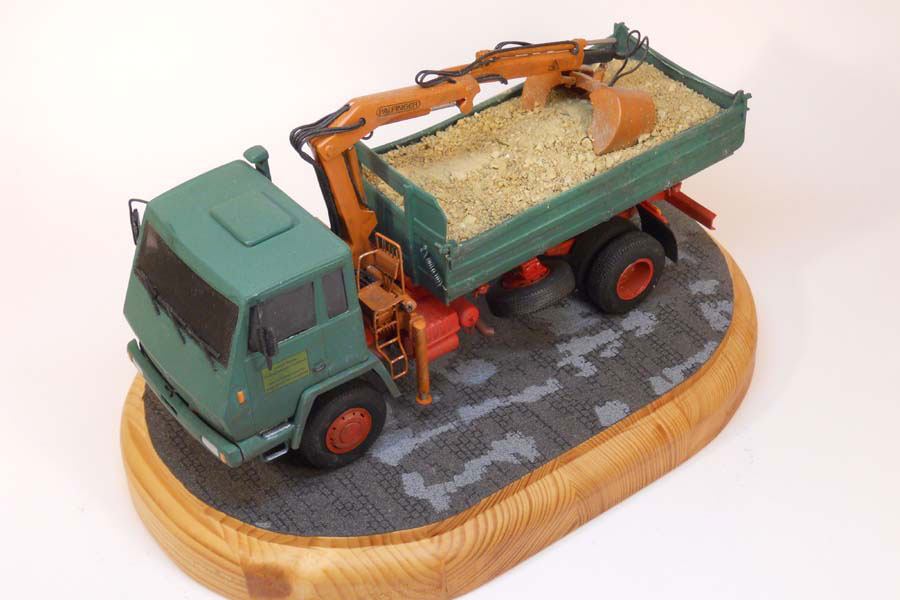
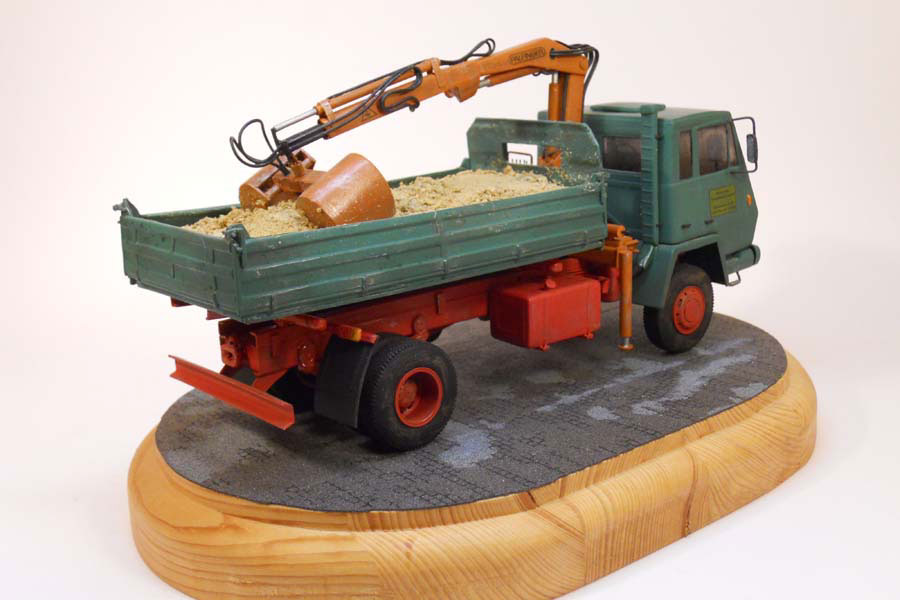
Steyr 1291 mit Ladekran
(Alfred Tilek - 2010)
The model was based on the real example of a Steyr 1291 with a loading crane. With the exception of small modifications such as the spare wheel suspension or the mounts for the exterior mirrors, the model was built "out of the box" from the kit Steyr 1291-1491(HSV-145). The tipper body was shortened to the original dimensions in order to create space for the loading crane, which was completely self-made.

Steyr 1291
with loading crane
Steyr 1291
with loading crane
Steyr 1291
with loading crane
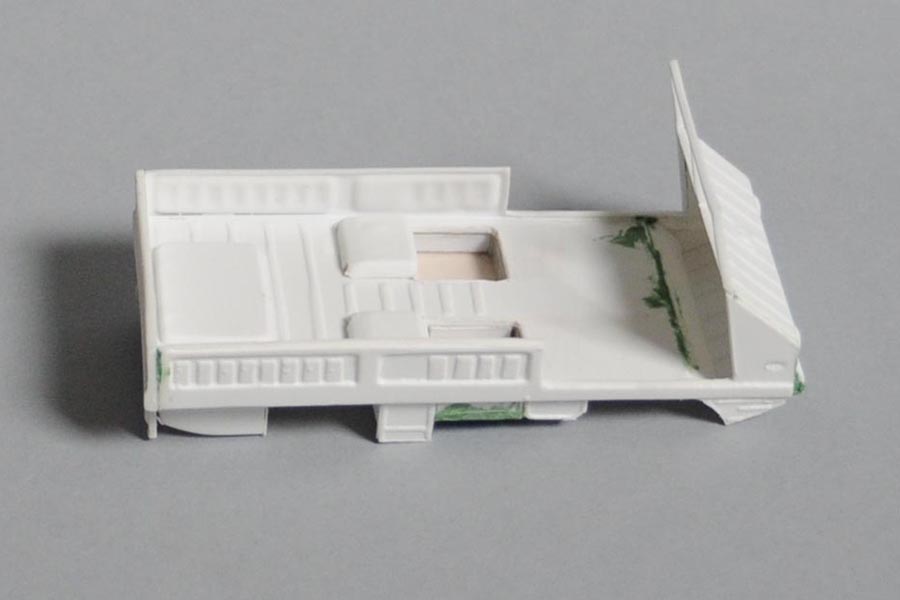
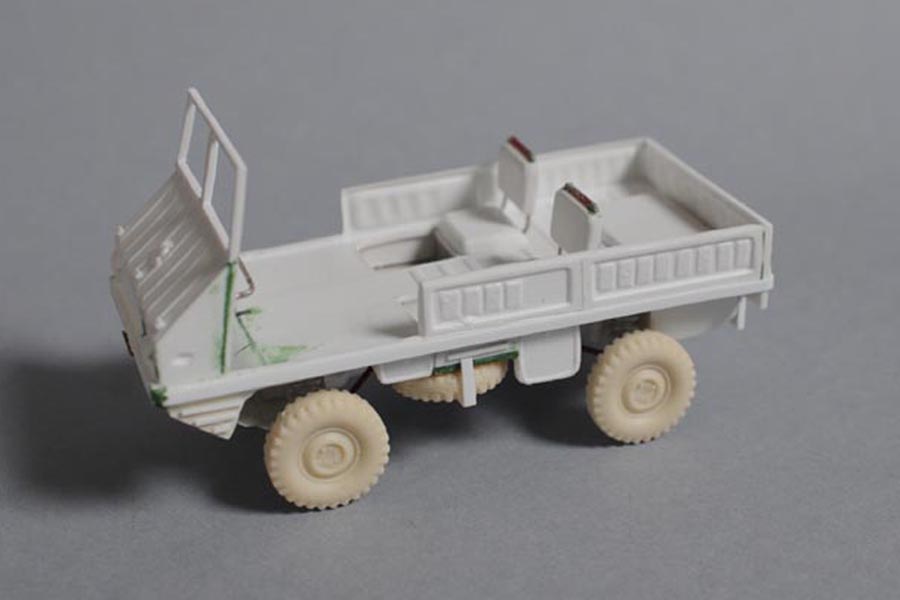
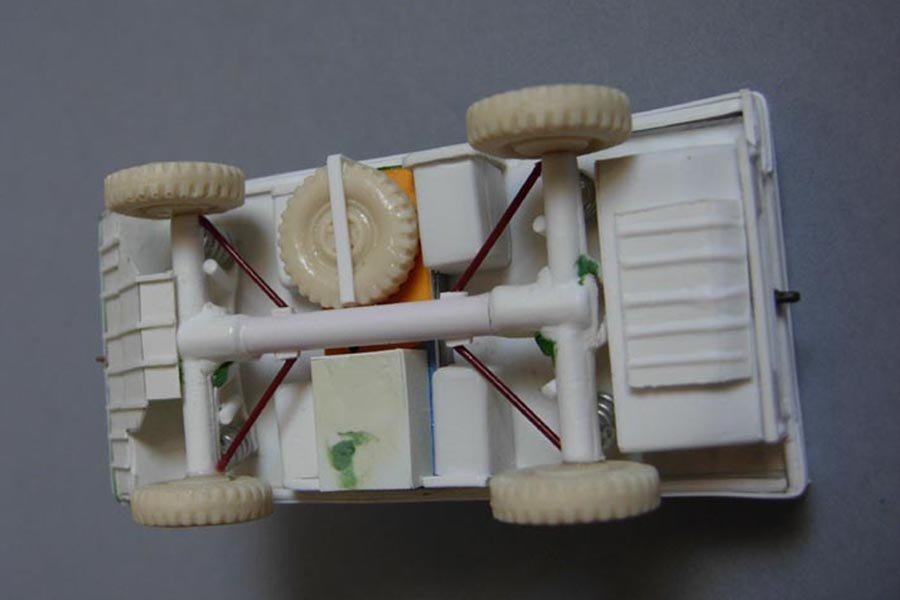
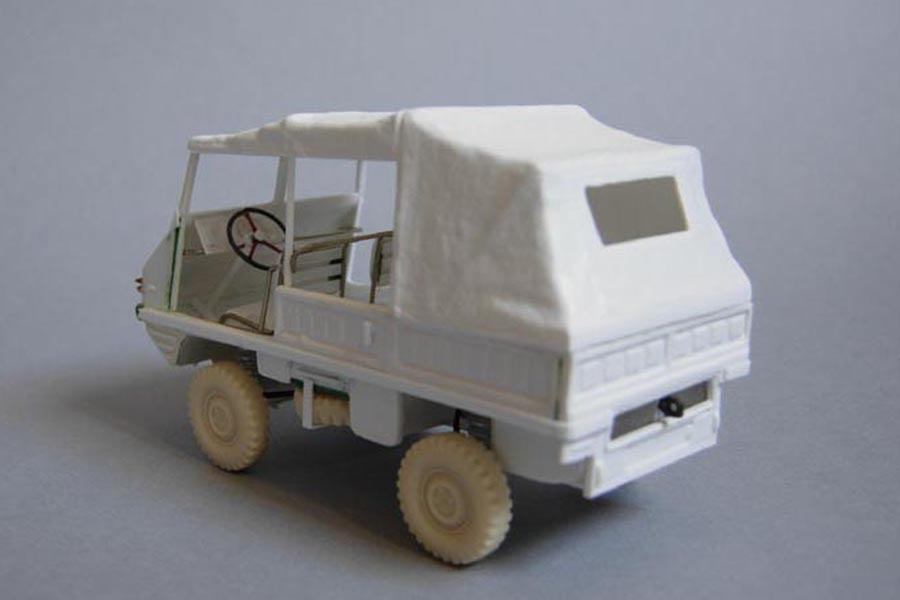
Puch 700AP "Haflinger" in Congo
(Uwe Schwinghammer)
Uwe Sch. describes in a few words the construction of this Puch 700AP "Haflinger". The Vacu kit from HSV-Modelle is currently the only kit of this vehicle in scale 1/35. I have got used to the special features of Vacu kits, but it still took a while until the kit turned into a model that I found satisfactory. During the construction phase I decided to assign the "Haflinger" to the first foreign mission of the Austrian Armed Forces in 1960 (a field hospital in the Congo). There the "Haflinger" in the version shown (interestingly, without UN script) was used. The finished model was built into a vignette on which I planted a palm from Preiser. The figure is a combination of two old figures from Italeri. I started building the model with the body. The footwell for the driver and front passenger was clad on the outside, so the inside dimensions remained the same. I also made some changes to the chassis in order to achieve better detailing. The resin wheels included in the kit are nicely cast and upgrade the model accordingly. After the assembly, the white paint followed according to the model I had chosen.
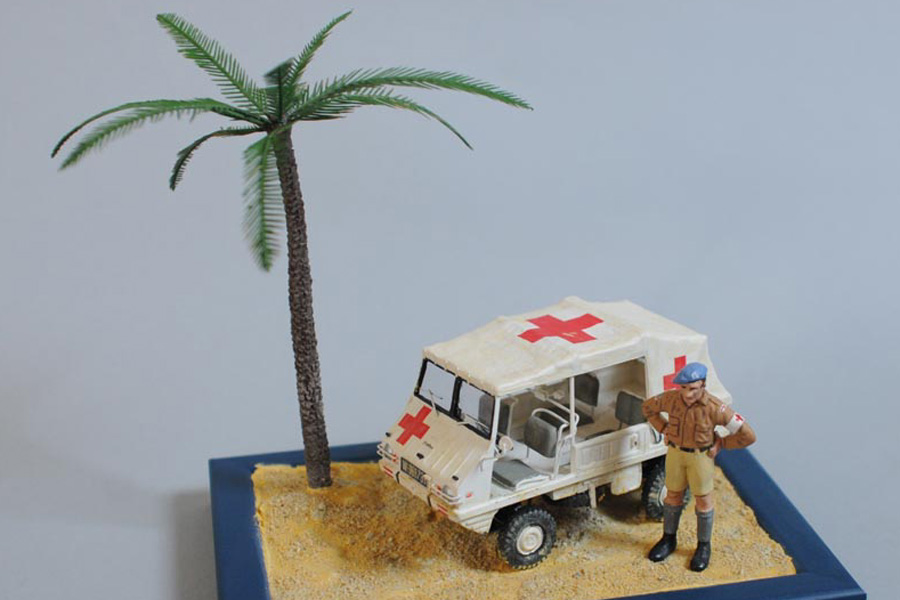
Puch 700AP "Haflinger"
UN-Mission Congo 1960
Puch 700AP "Haflinger"
Body
Puch 700AP "Haflinger"
Resin wheels
Puch 700AP "Haflinger"
Chassis
Puch 700AP "Haflinger"
completely assembled but still unpainted
Puch 700AP "Haflinger"
finished model
Puch 700AP "Haflinger"
finished model
ÖAF 32.281 FDAK
(Stefan Nadler)
This is a model for the three-axle tipper ÖAF 32.281 FDAK, which is very rarely found in the Austrian Army. The 2-axis version is much more common. Some pictures of the original from the Internet were used to support the construction of this 3-axis version. Compared to the two-axle vehicle, the side walls of the tipper body are higher on this vehicle. By adjusting the length and height of the kit parts according to photos, this implementation was not difficult. A few other small parts were also built, such as the oil filler neck behind the cab. Chassis and cab are built "out of the box" (HSV-144). For the sake of simplicity, the tank, which should actually be much larger, was taken from the kit.
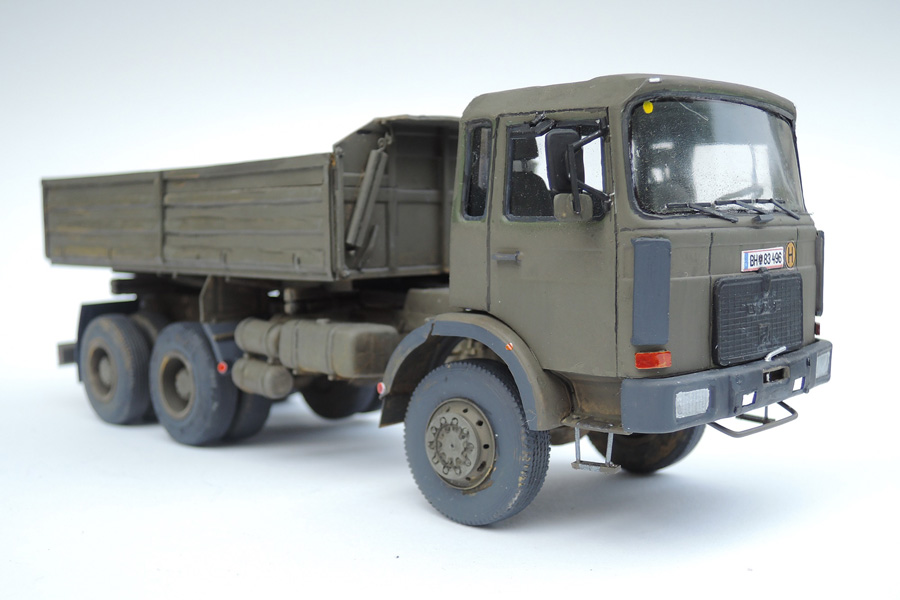
ÖAF 32.281 FDAK
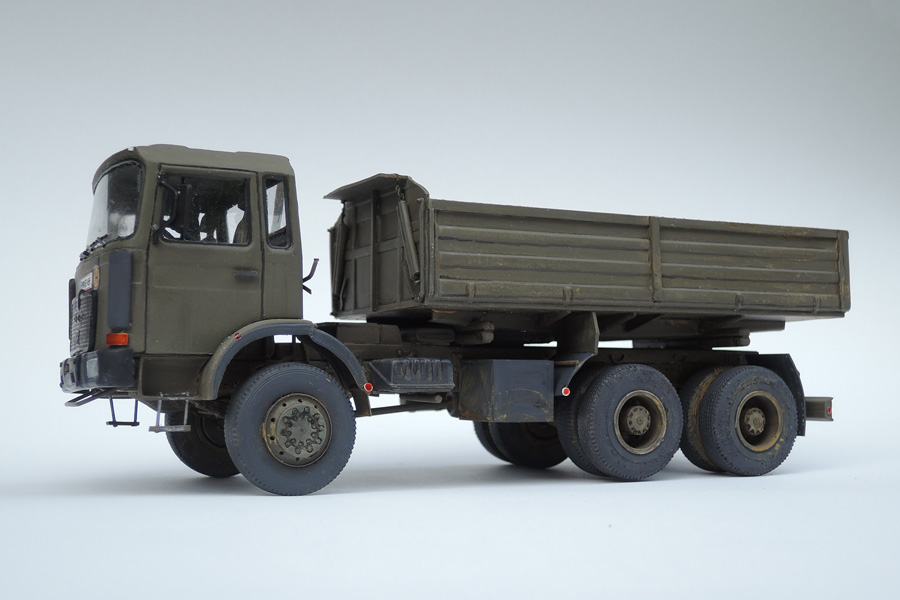
ÖAF 32.281 FDAK
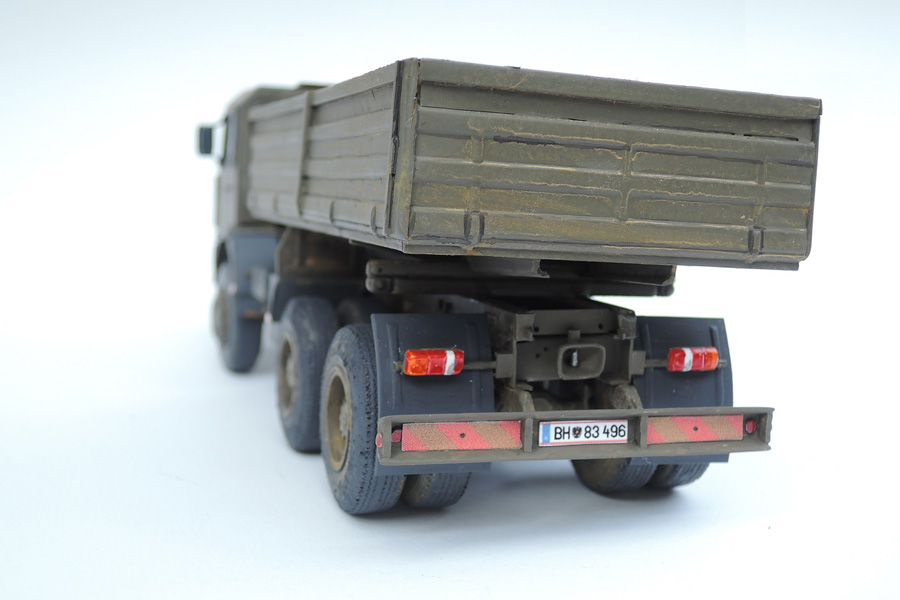
ÖAF 32.281 FDAK
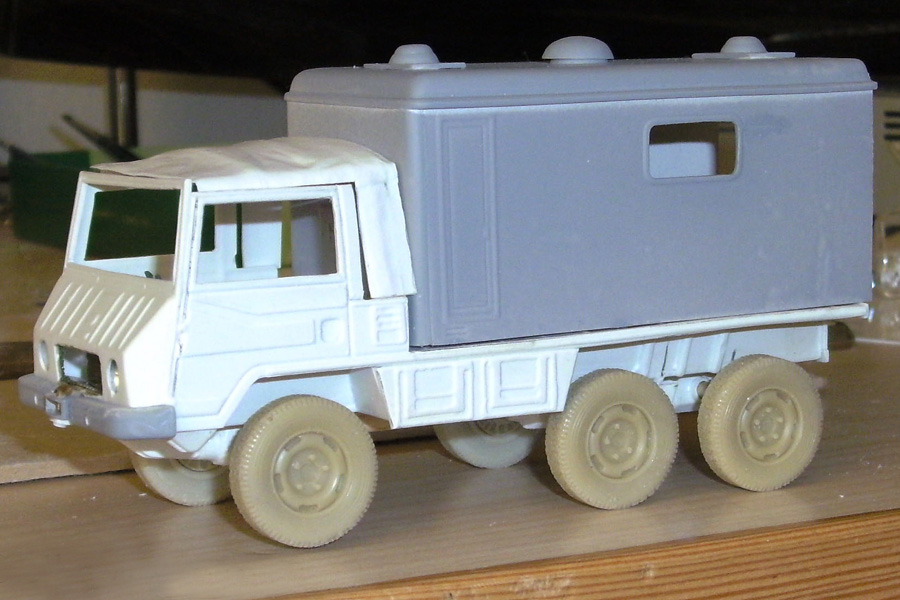
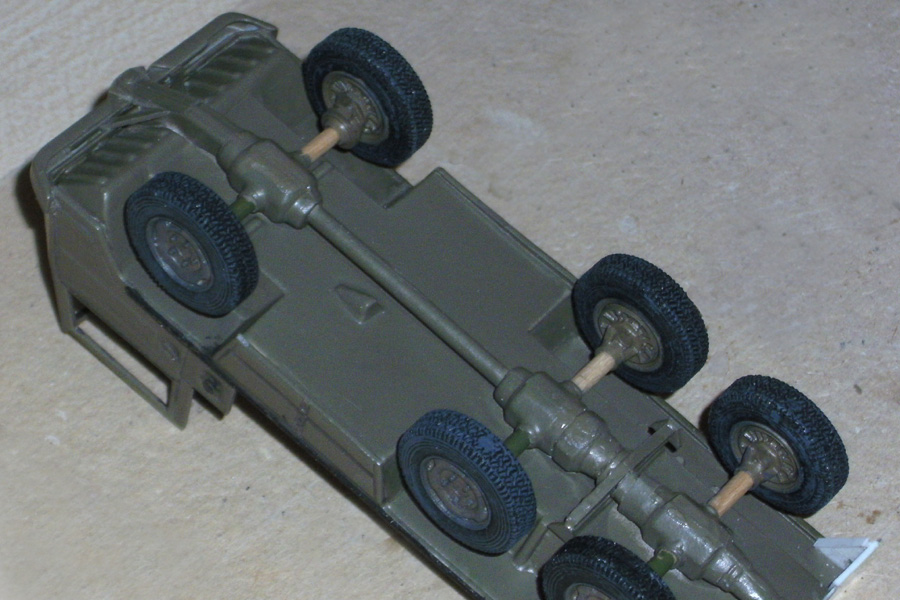
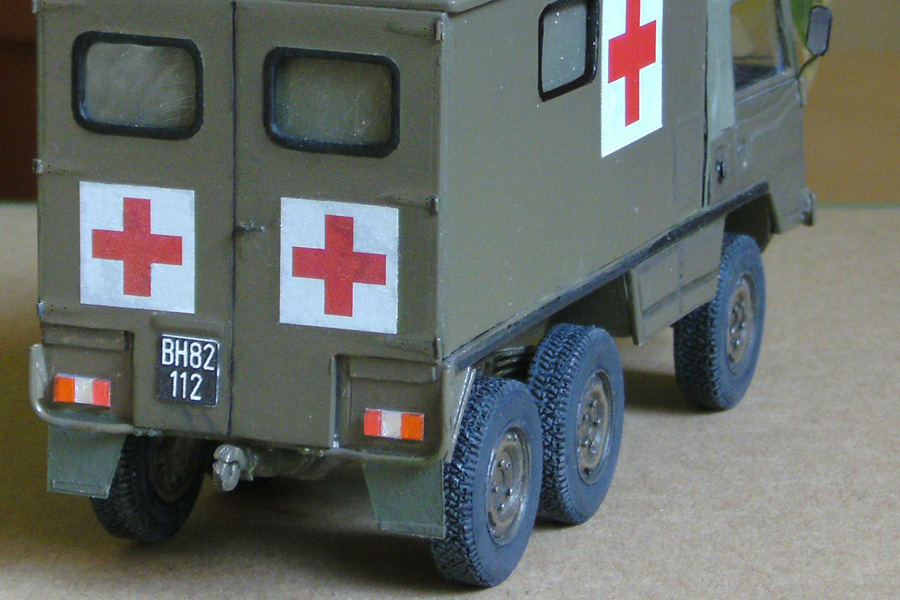
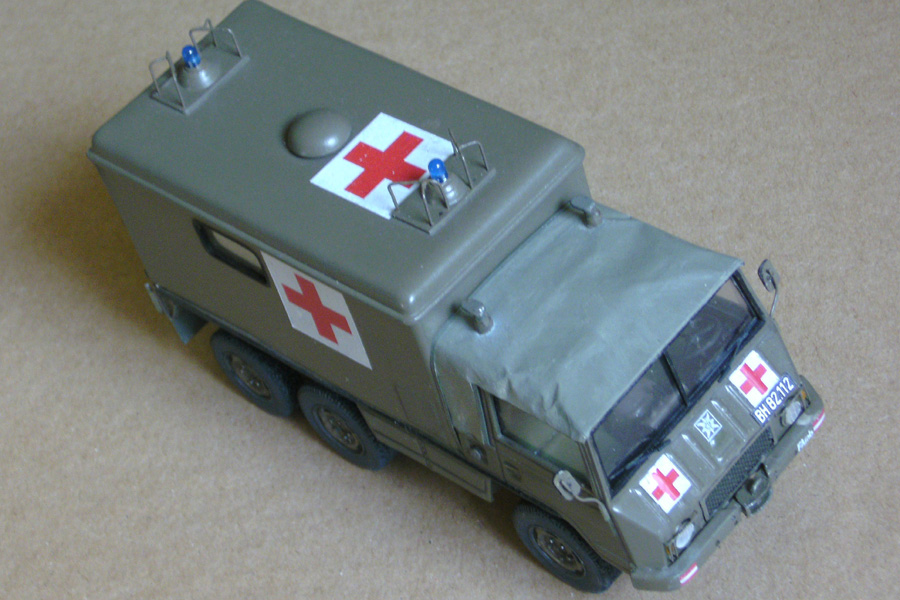
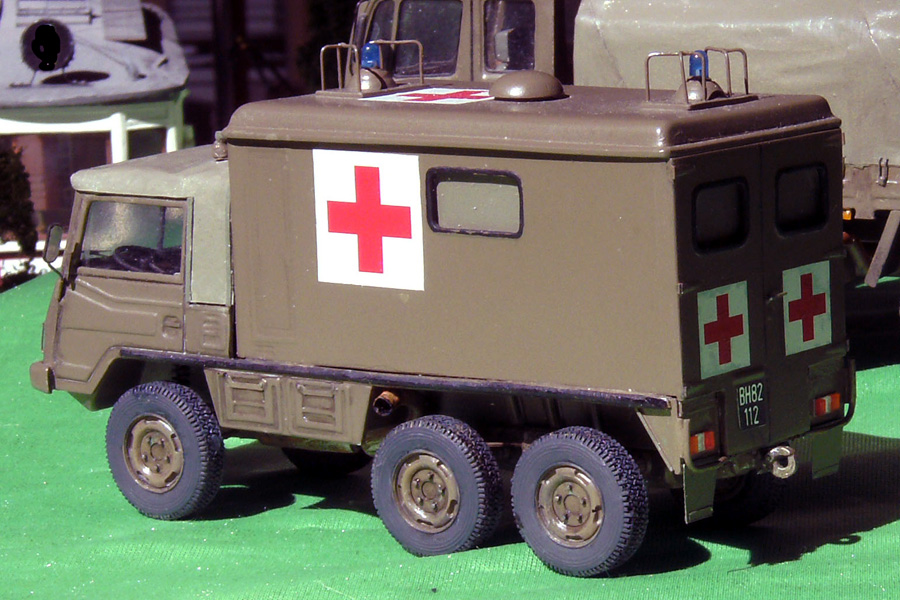
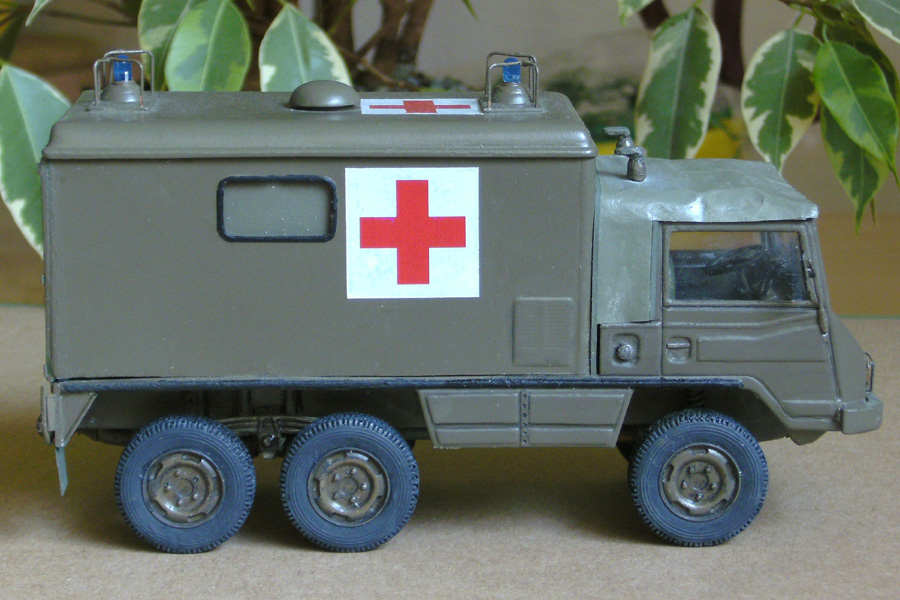
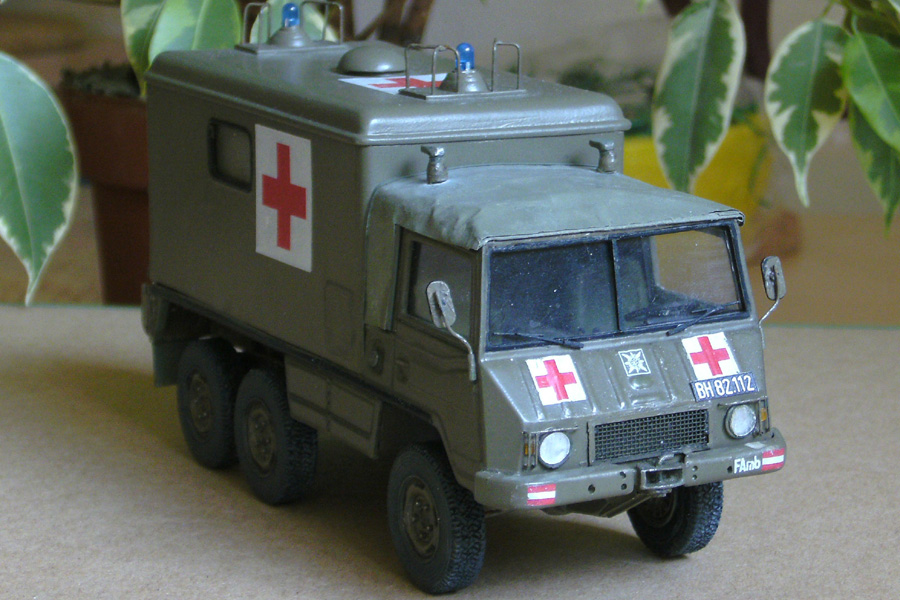
Pinzgauer 712 - SAN
(Ludwig Aschauer)
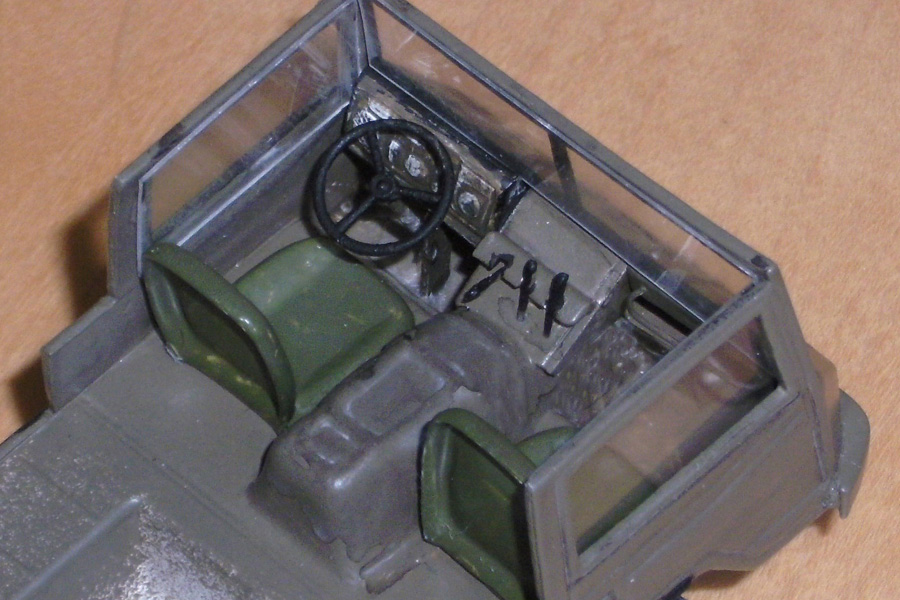
The original of this Pinzgauer 712 SAN was in service with the 6th Staff Battalion in Innsbruck. With a little practice in building Vacu-kits, the kit is easy to assemble. A sufficient accuracy of fit and the sufficient building instructions do not leave many questions unanswered. However, this is not possible without filing, cementing and grinding. You get a nice basic model for little money, which, depending on how high your expectations are, can be completed with scratch construction and lots of prototype photos. Because of the many detailing options, I now prefer to build vacuum models than a traditional injection molded model. The thin wall thickness of the components creates a very realistic, filigree impression when looking at the model. However, vacuum models are less suitable for beginners.
Scratch:
Headlights with branch deflector, rear-view mirror, front and rear bumper, blue light with branch deflector. Windshield wipers, exhausts, taillights. I cut the taillights out of a TicTac box. Tissue paper cab tarpaulin.
Painting:
Model: RAL 7013 (ÖBH) - Hood“: RAL 7003 semi-gloss.
Pinzgauer 712-SAN
Pinzgauer 712-SAN
Pinzgauer 712-SAN
Pinzgauer 712-SAN
Pinzgauer 712-SAN
Pinzgauer 712-SAN
Pinzgauer 712-SAN
Pinzgauer 712-SAN
Pinzgauer 712-SAN
Pinzgauer 712-SAN
Pinzgauer 712-SAN
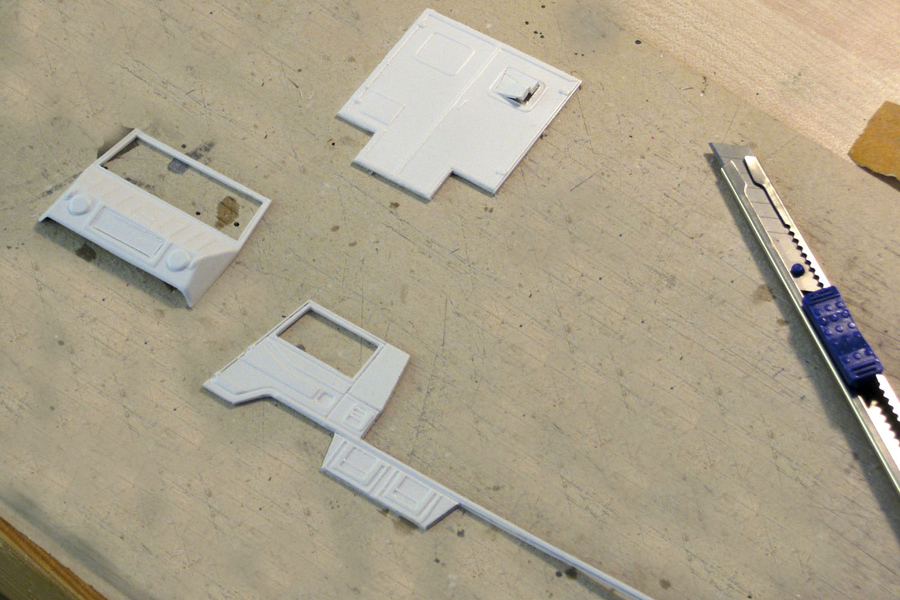
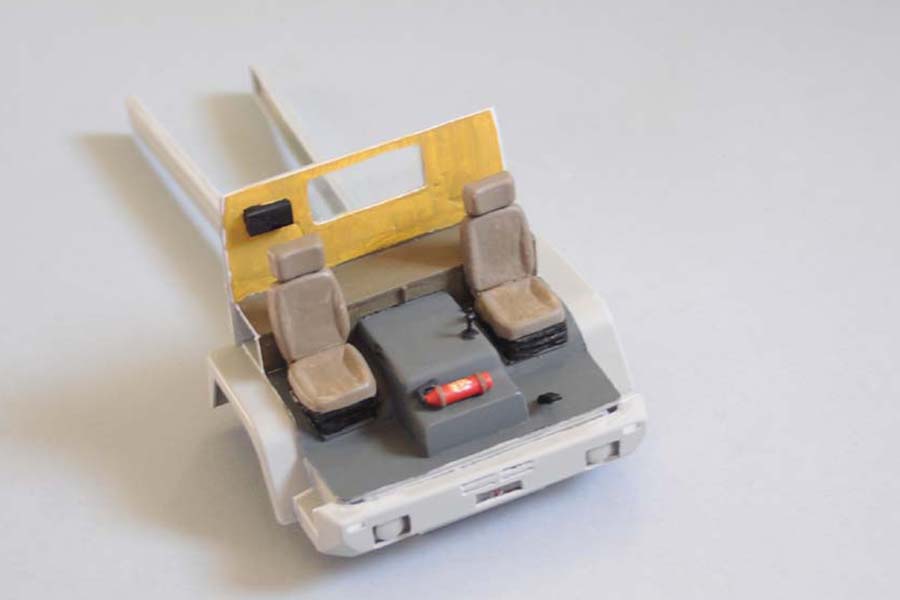
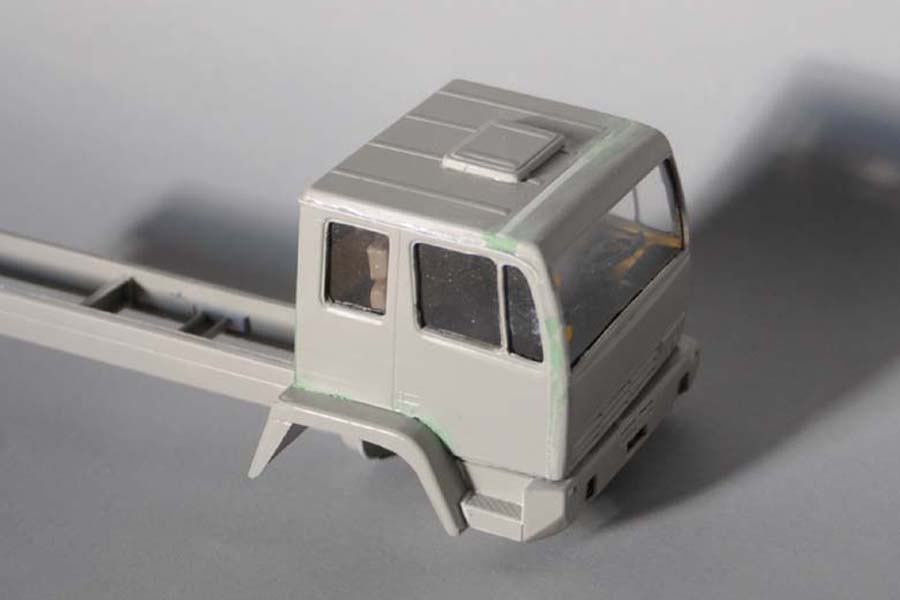
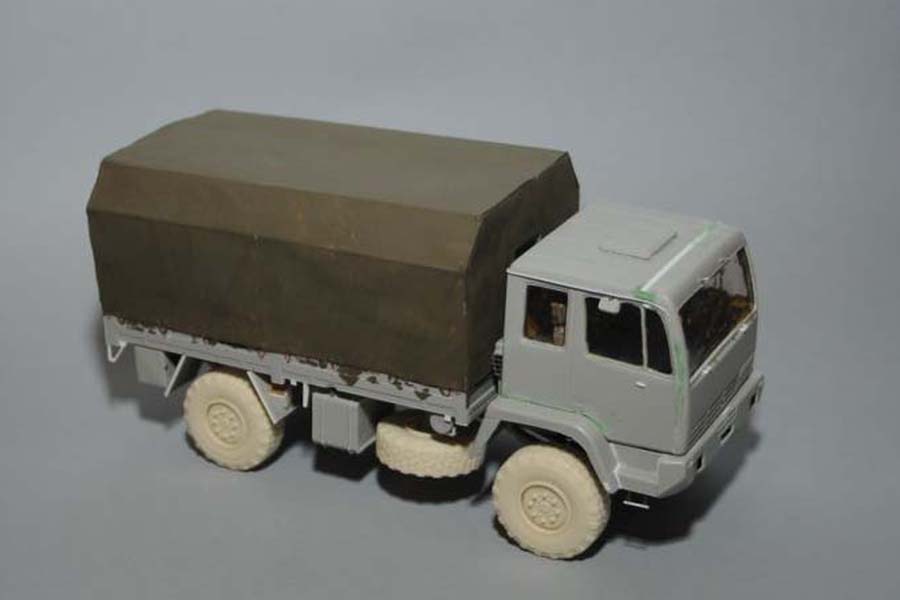
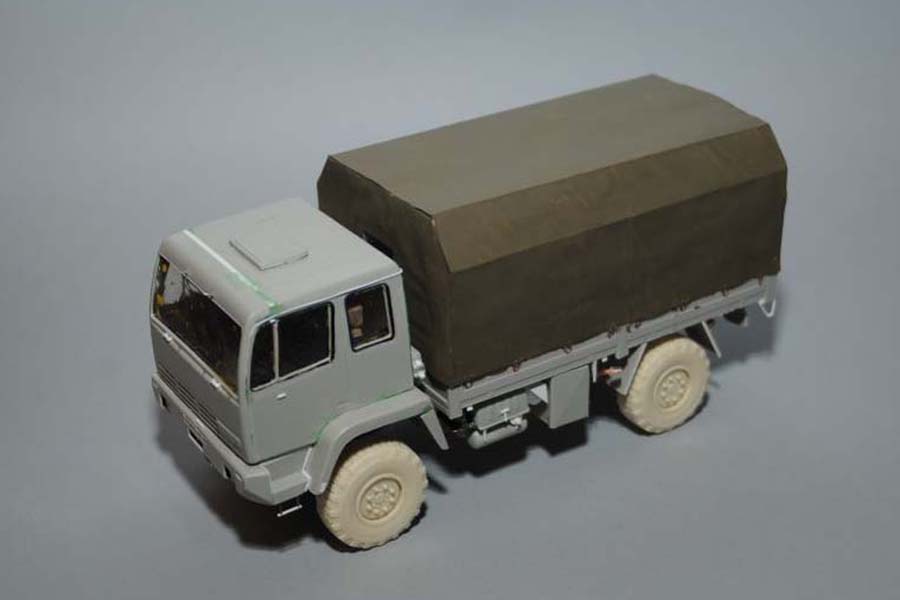
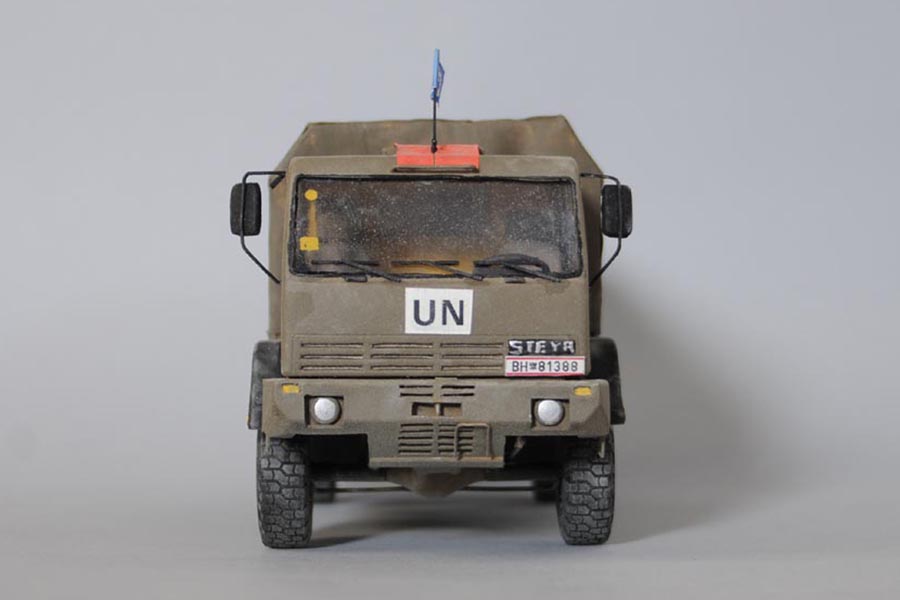
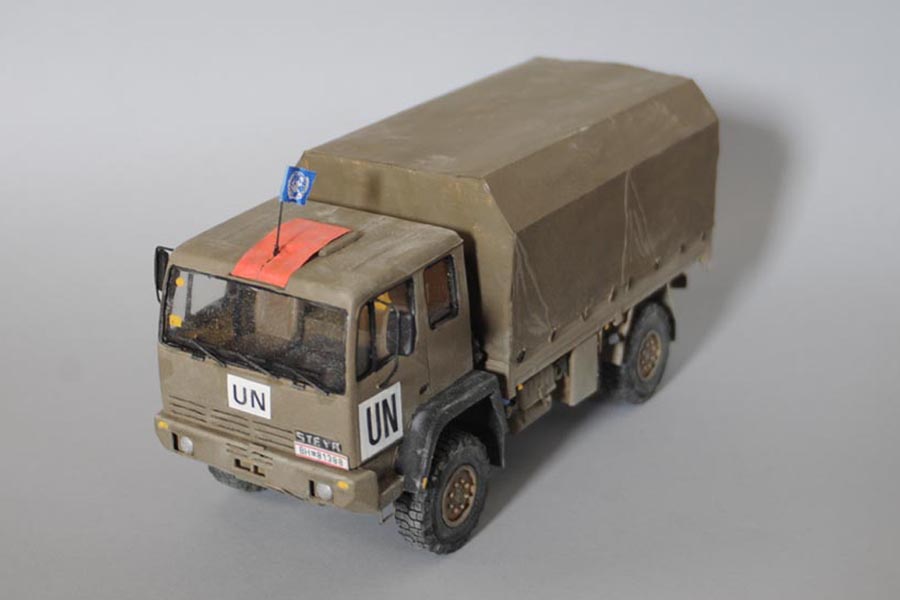
Steyr 12M18 - Mission MINURCAT in Chad
(Uwe Schwinghammer)
Apart from the usual trying, sanding, filling and improvising - which is part of a Vacu-kit - I was very satisfied with the kit. The individual components are shown very finely and the resin wheels included in the kit are cast in very good quality. The only small mistake I noticed about the kit was that the makeshift bench behind the driver and front passenger seats, under which there is a storage space, turned out a little different, let's say.
I started the kit with the cab. The bumper should be a little further ahead. I have already moved them by 1mm, more was not possible, otherwise the other parts would no longer fit. The further assembly of the model went without any problems. The rear-view mirrors and windshield wipers are attached after painting. I tried to show everything as detailed as possible. At least the things you see. As already mentioned, I was quite happy with the kit except for a few small things.
My model is a vehicle from the MINURCAT mission in Chad. The paint job is more or less finished. I've already tried a bit with pigments on the roof and the fenders - the rest is still to come. The platform is not yet fixed so that the chassis can age even better. However, I noticed that I made a mistake while building it. The tarpaulin bows can be inserted high or low. There is also a higher and a lower row of hooks on the platform for this purpose. Unfortunately, my model has a tall structure and the tarpaulin is attached to the lower hooks. Which shouldn't be so in real life.
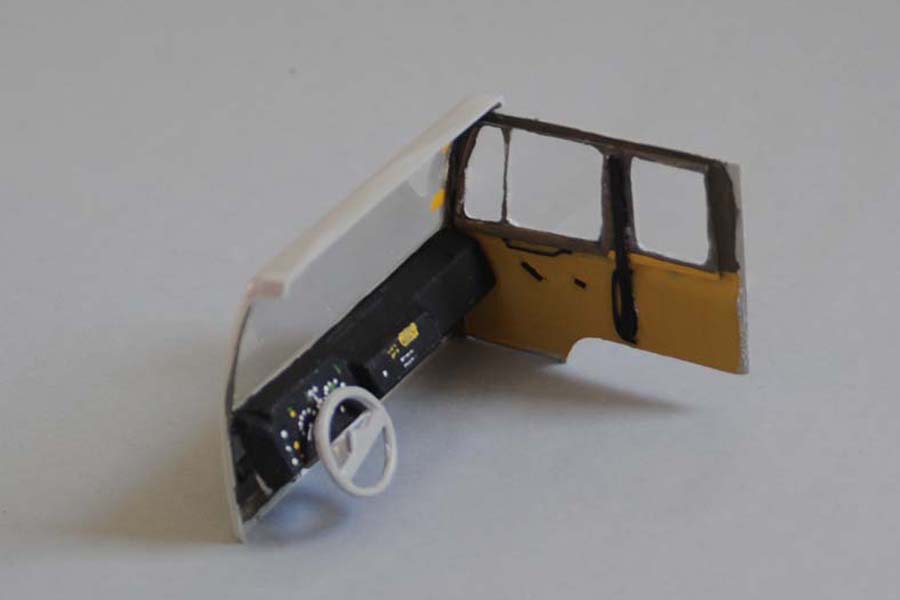
Steyr 12M18"
Fahrerhaus Innenseite
Steyr 12M18
Fahrerhaus Inneneinrichtung
Steyr 12M18
Fahrerhaus
Steyr 12M18
Steyr 12M18
Steyr 12M18
Steyr 12M18
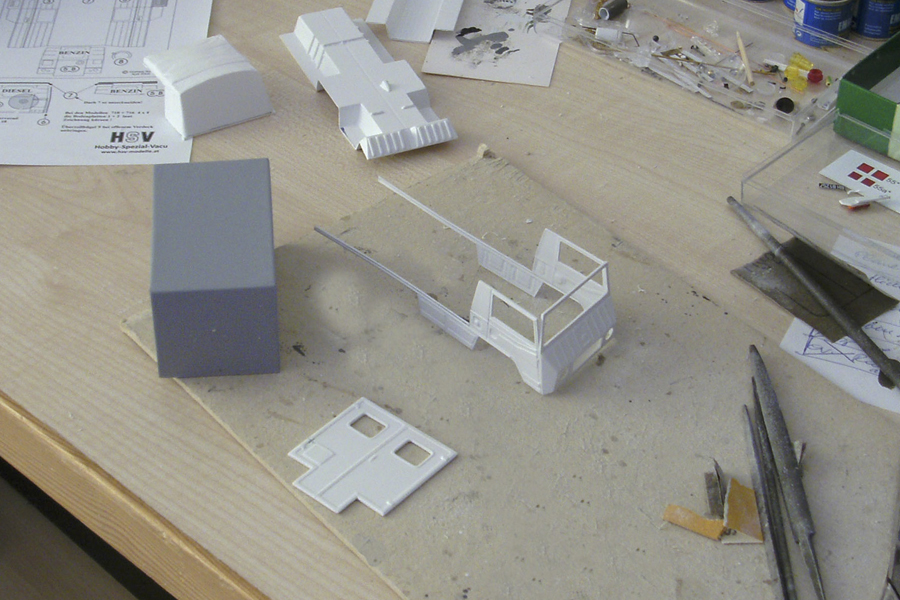
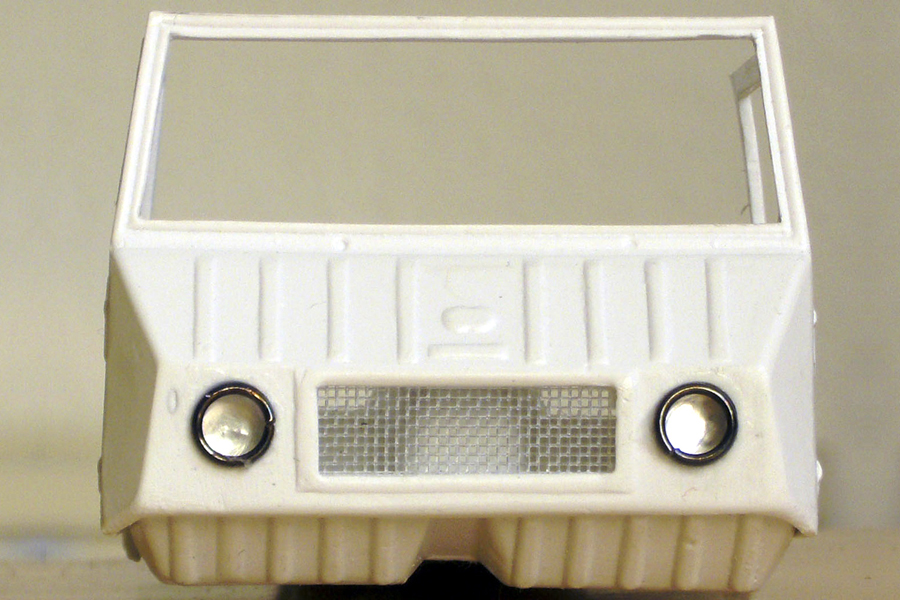
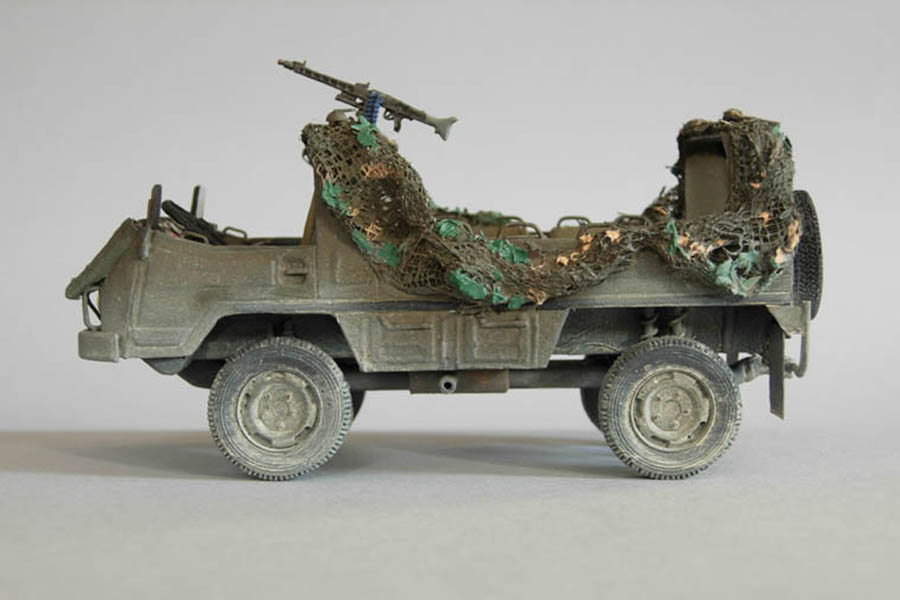
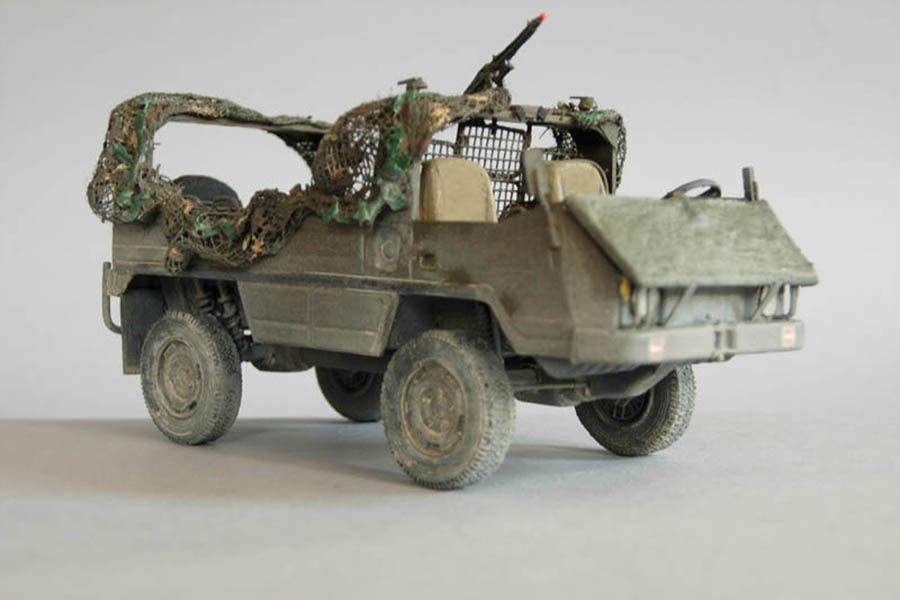
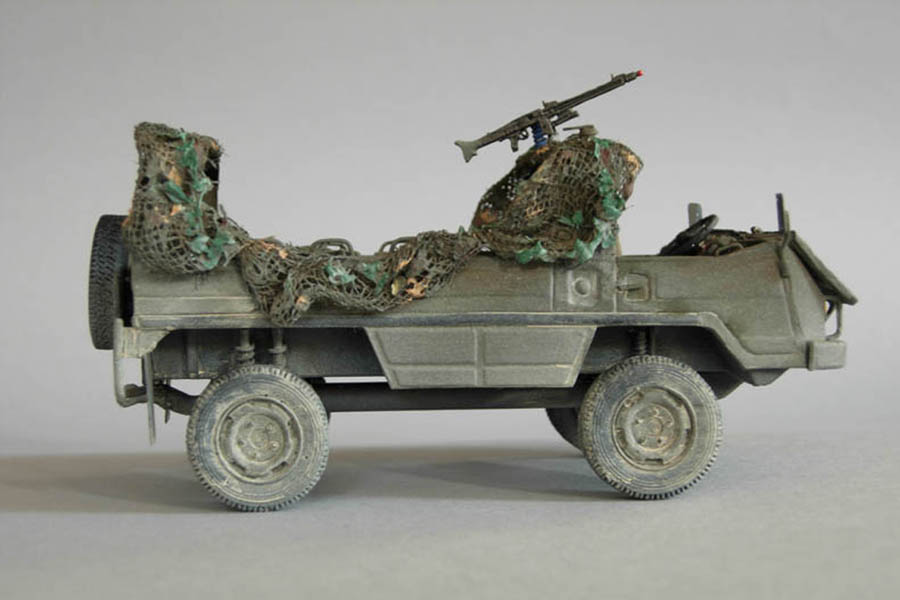
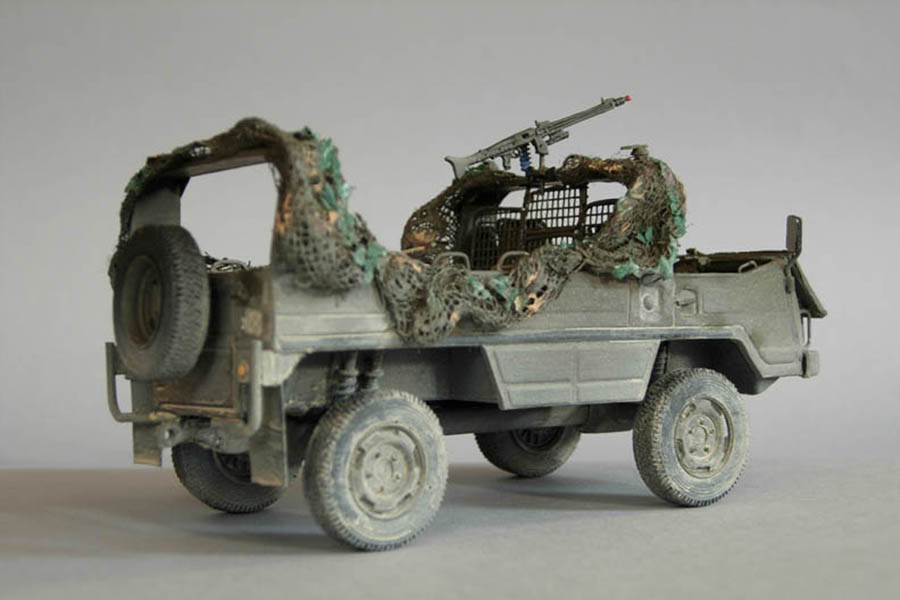
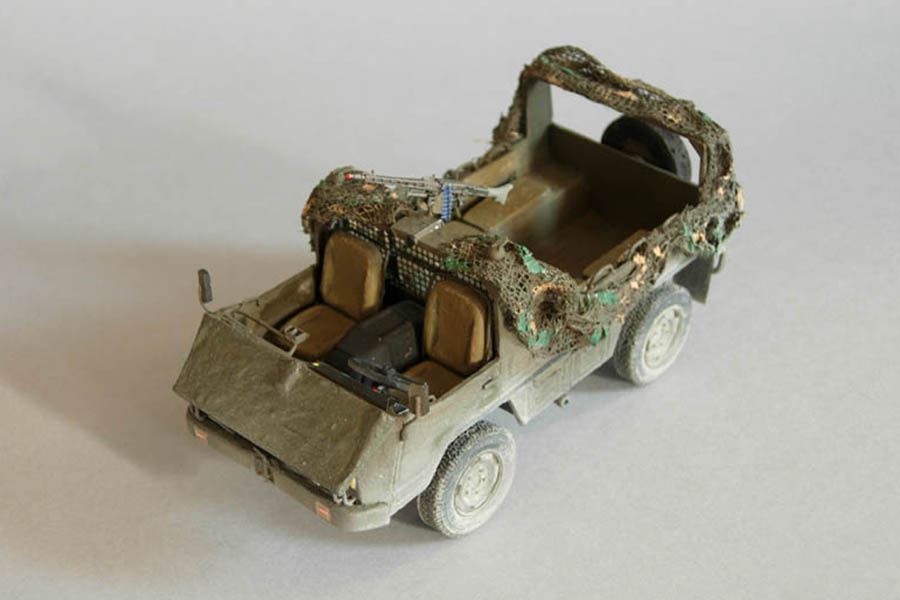
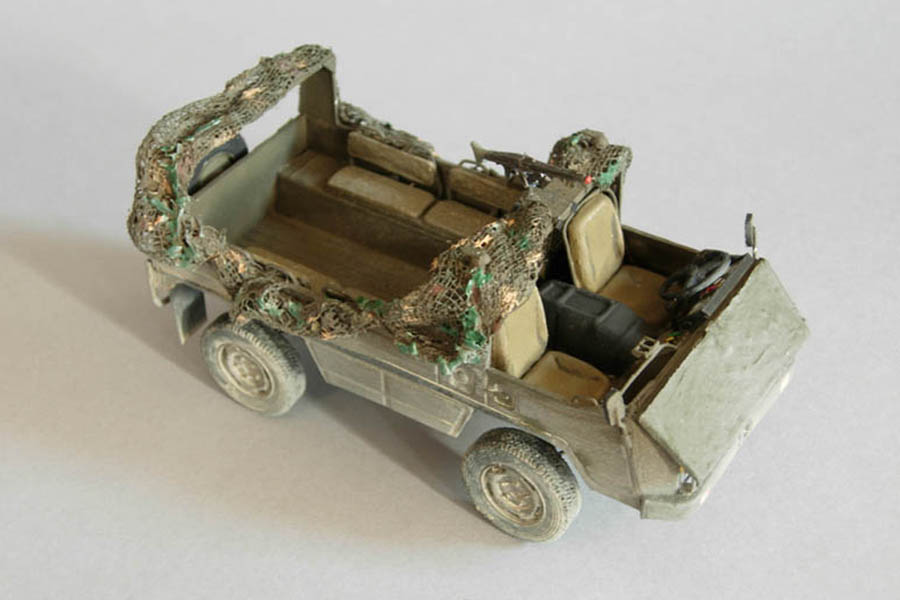
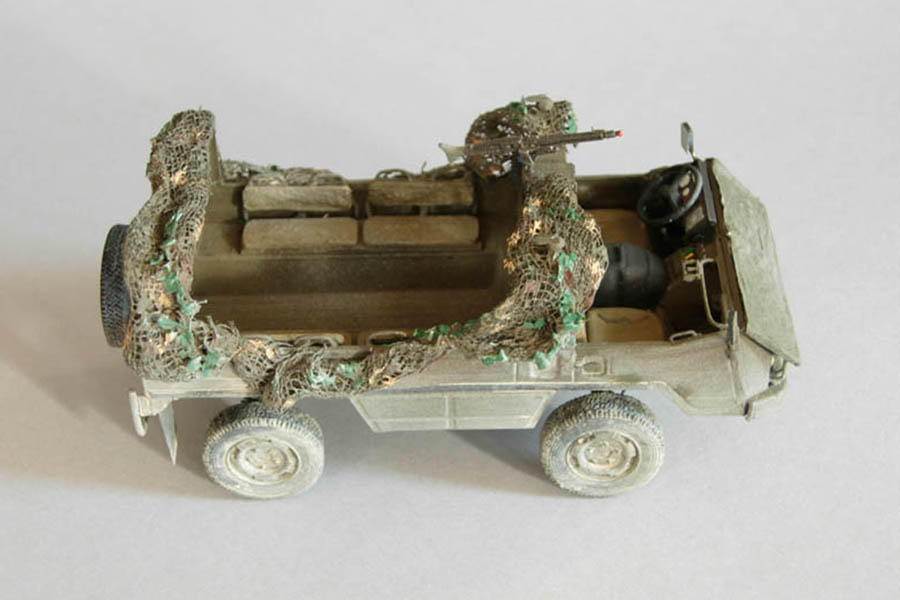
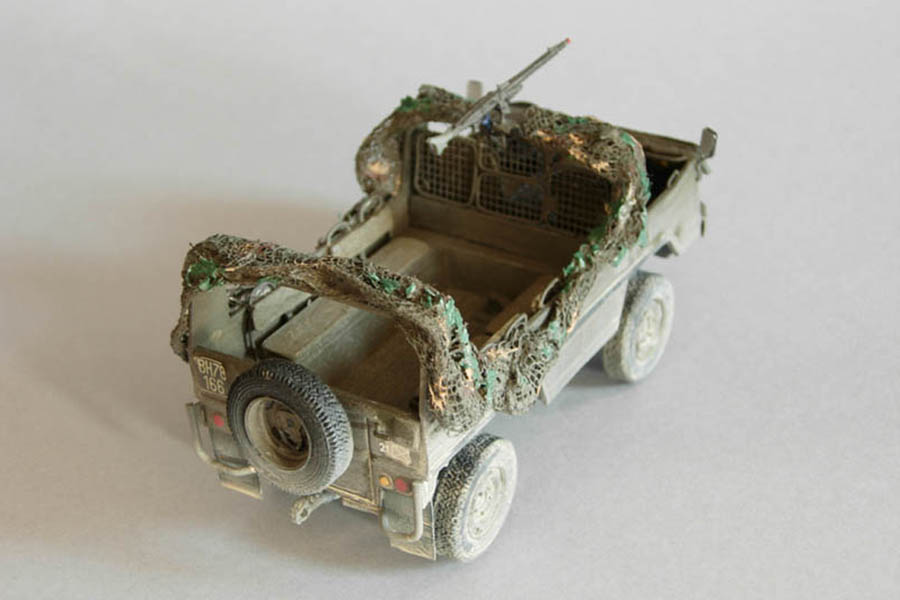
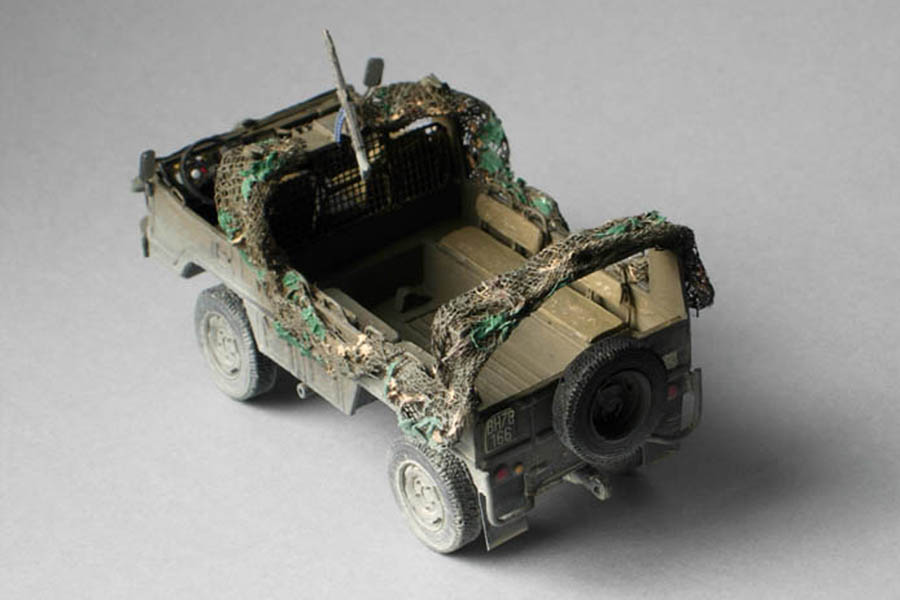
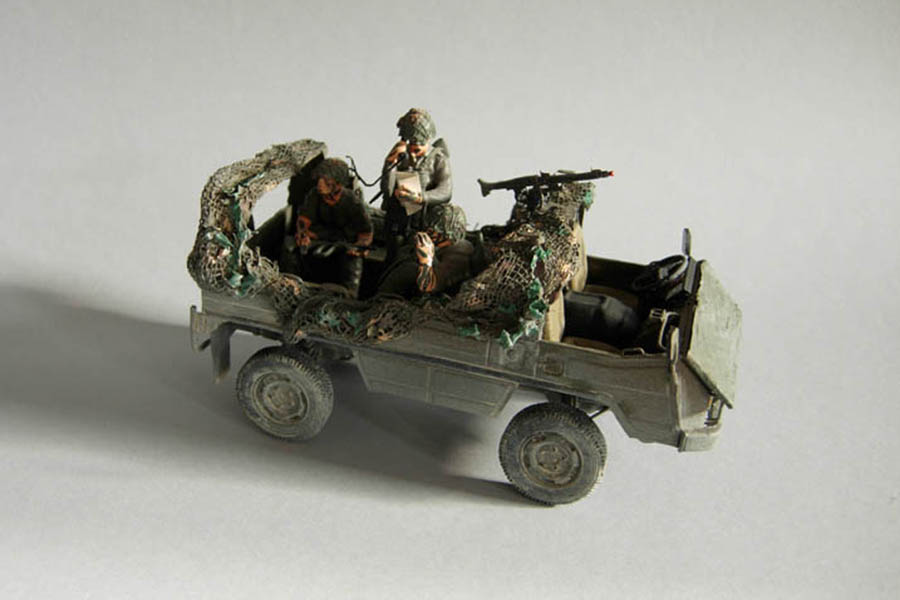
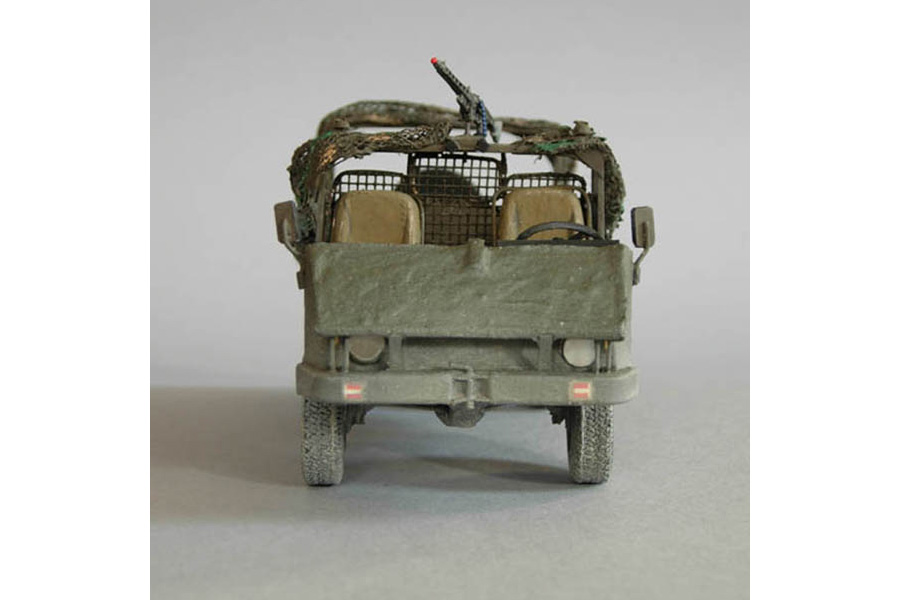
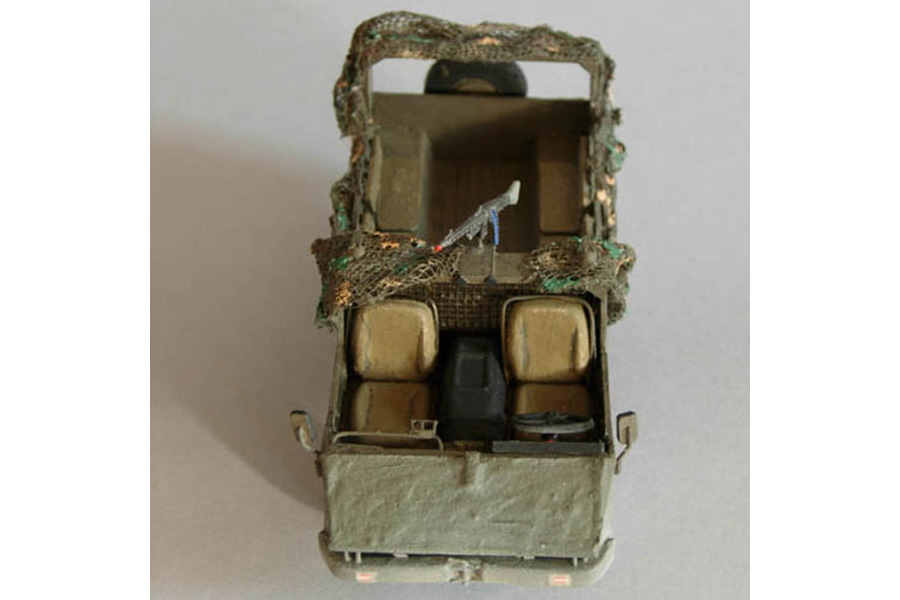
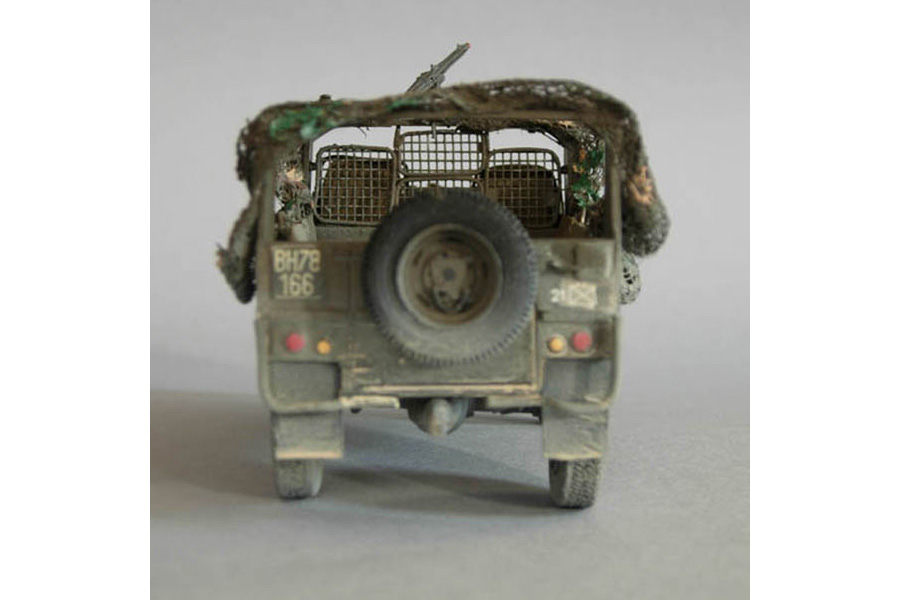
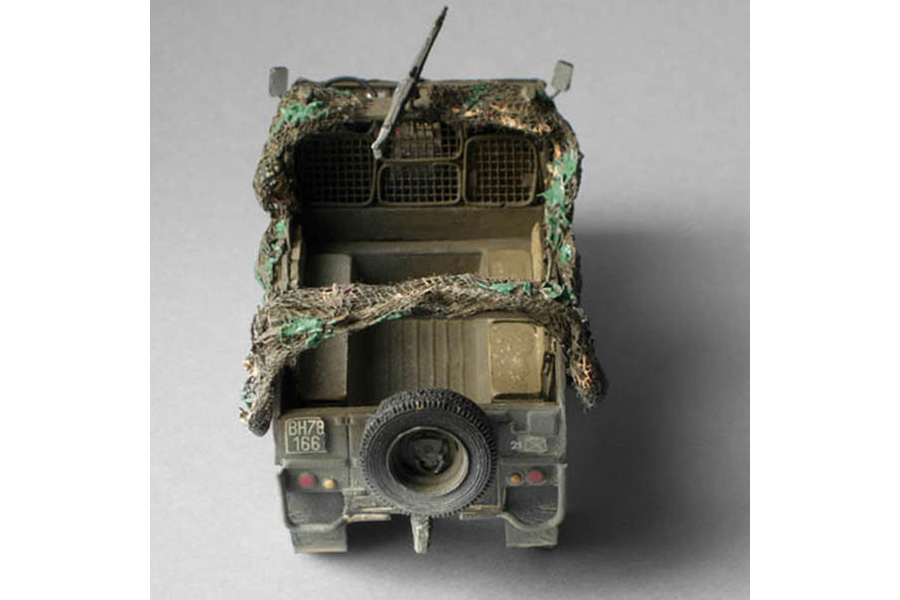
Pinzgauer 710M in the classic reconnaissance "outfit"
(Uwe Schwinghammer)
The original of this Pinzgauer 710M Model was a vehicle in the classic reconnaissance "outfit". Dismissed, windshield folded down, MG mounted and hung with camouflage nets. The only possible basis for this is the HSV-Vacu-kit 102. A Vacu-kit naturally made the project particularly exciting, especially since there is no interior design. And there you need many, many original photos. In retrospect, of course, I made some (more or less ugly) mistakes with this model. The assembly of the "raw version" of the 710M was very quick and easy. There was hardly any ambiguity about where which part belongs. But then came the subtleties.
The first difficulty was the slightly curved roll bars of the Pinzgauer. Something that, despite days of tension with a rubber band, I couldn't work out the way it should. In the end, this problem was solved by the camouflage nets above. In any case, you shouldn't forget the small triangles that are attached to all corners to stiffen the brackets.
This was followed by the construction of the bench seats with the characteristic brackets on the backrest, which I bent from thin wire. It works best if you first draw a template. Unfortunately, I found out afterwards that my benches were a bit too short.
The grid between the driver's area and the loading area or crew compartment was clearly the most complex. It consists of two large and two small framed grids, from which the small middle ones can be opened. Again, I had drawn a template for the frame and then bent the parts out of thin wire. As the grille itself, I used a piece of fly screen.
The MG mount is a very primitive construction. Basically it only consists of a "board" with a rod on which the MG 74 is hooked. The construction is then simply clamped onto the roll bar. I built this MG mount from a plastic plate - four small black screws attached to the corners, the rod and that's it. In addition, I have attached the brackets for two antennas to the front roll bar.
The next big thing was building the driver's cab. The two existing Vacu parts only represent the dashboard and the glove compartment. The center console with brake, gear shift, four-wheel drive, etc. is completely missing. So I bent the handle on the passenger side out of wire and made the rifle mounts out of plastic strips. The heater (lower left on the passenger side, was made from a piece of copper cable and a small pot on it. There are no limits to the mania for detailing. As a small tip on the side. The rear-view mirrors would have to be rounded off a bit more than on my model.
At the front, the trickiest are the branch deflectors above the headlights and indicators. Usually these are in three parts (two vertical and one horizontal bracket). I did not use the horizontal bracket, as it disappears under the folded windshield. In the original, the windshield is also attached with two brackets (left and right of the radiator grille) so that it doesn't bounce constantly while driving. I cut off the raised headlights and stuck them back on the back as reflectors, and then used rather thick and somewhat cloudy plastic discs for the front glasses. The cover of the windshield has an elevation in the middle under which the windshield wiper motor is located on the original.
I have given the chassis minimal details. I only gave the model the suspension and a muffler.
The model then got an olive green paint, was aged and dusted. The camouflage nets were made from bandages and oregano. The tactical badge of the Jägerbataillon 21 is composed of parts of a decal from Roco and scratch-off letters. I took the old army license plate from a decal sheet from HSV-Modelle.
Finally, the model was supplemented with figures. They come from the M113 kit and the Command Post Set by Tamiya and show soldiers of the German army in the early 1990s. The assault rifles 77 are made of pewter and come from HSV models. When putting together figures and Pinzgauer it is noticeable that either the males are too big or the Pinzgauer is too small. In any case, they would not fit under the tarpaulin if they were sitting..
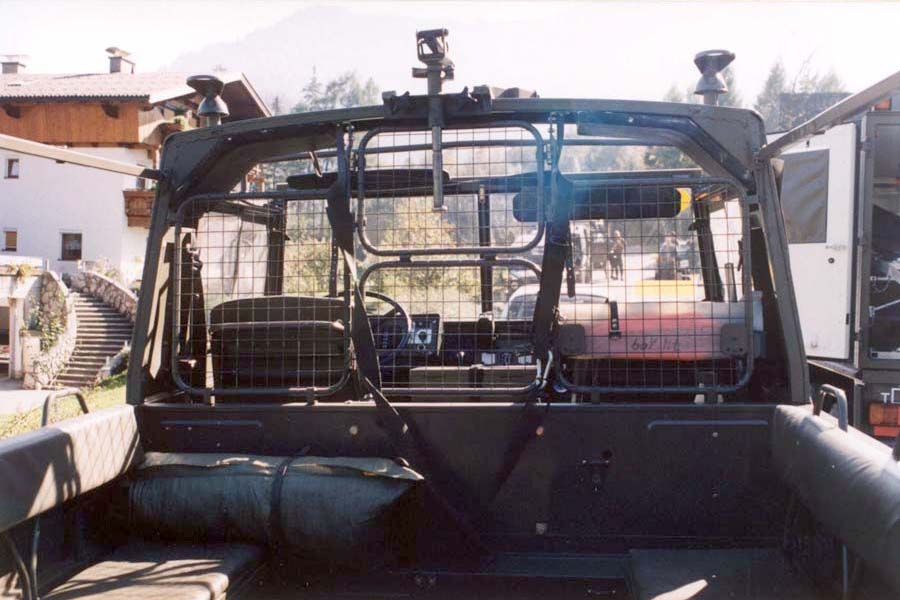
Pinzgauer 710M
The original
Pinzgauer 710M
The original
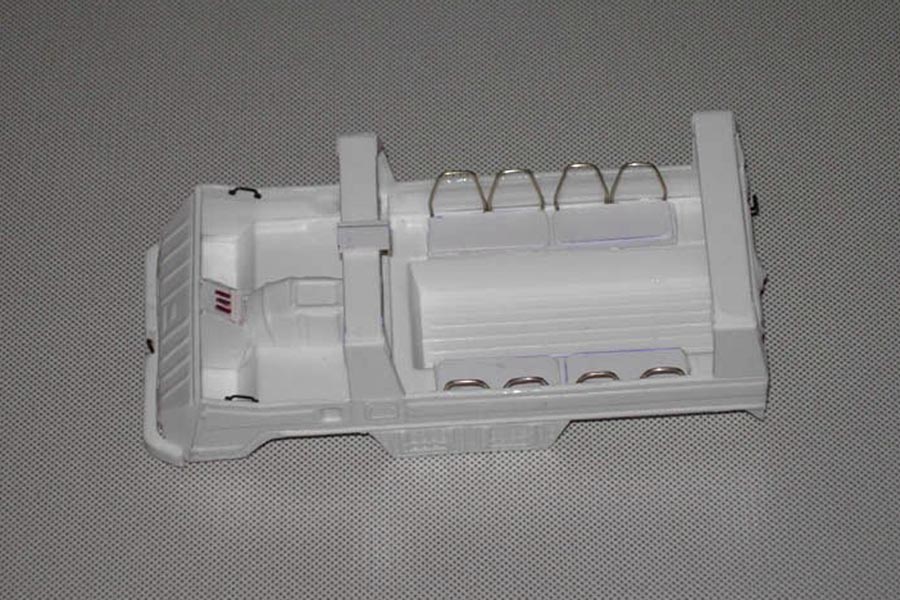
Pinzgauer 710M
The body
Pinzgauer 710M

Pinzgauer 710M
Pinzgauer 710M
Pinzgauer 710M
Pinzgauer 710M

Pinzgauer 710M

Pinzgauer 710M
Pinzgauer 710M
Pinzgauer 710M
Pinzgauer 710M
Pinzgauer 710M
Pinzgauer 710M
Pinzgauer 710M
Pinzgauer 710M
Pinzgauer 710M
Pinzgauer 710M
Pinzgauer 710M
Further building reports from HSV models
I also found reports on various model making websites. I am sharing these links with you
| Saurer Beobachtungspanzer A1 | modellversum.de |
| Steyr 680M3 | modellbauseite.at |